
Powerpole Connector Crimping Guide and Tips
Learn how to properly assemble and crimp Powerpole style connectors for reliable, low-resistance connections.
Correct installation ensures consistent performance in applications such as ham radio, robotics, battery systems, and DC power connections.
Anderson Powerpole connectors are widely used in ARRL ARES (Amateur Radio Emergency Service) environments where standardized and reliable DC power connections are important. Their design supports quick connection between radios, batteries, and power supplies without adapters.
- Standardized DC connector used in ARES operations
- Interoperable design for radios, batteries, and power supplies
- Quick-connect system for portable and field use
- Reliable electrical contact for consistent performance
Commonly adopted by emergency communications groups across North America, these connectors help ensure consistent polarity, fast deployment, and dependable performance. Suitable for amateur radio operators, portable power systems, and emergency preparedness applications.
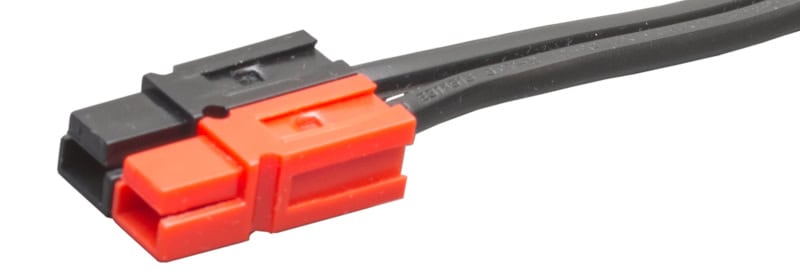
Powerpole Connector Features and Benefits
- Genderless housings reduce complexity and simplify assembly
- Modular design allows connectors to be stacked in multiple configurations
- Compatible with wire, PCB, and busbar contacts
- Low-resistance connection using plated contacts and spring pressure
- Color-coded housings help maintain consistent polarity
- Self-securing design using internal spring tension
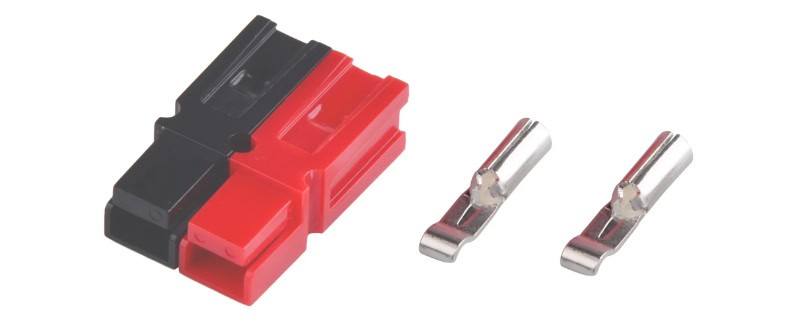
Electrical Ratings and Wire Sizes
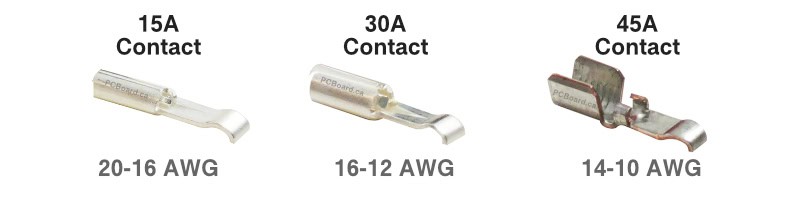
| Contact Size | Wire Gauge (AWG) | Typical Current | Max Voltage |
|---|---|---|---|
| 15A | 20–16 AWG | Up to 15A | 600V |
| 30A | 16–12 AWG | Up to 30A | 600V |
| 45A | 14–10 AWG | Up to 45A | 600V |
Selecting the correct contact for your wire size is critical for a secure crimp and proper electrical performance.
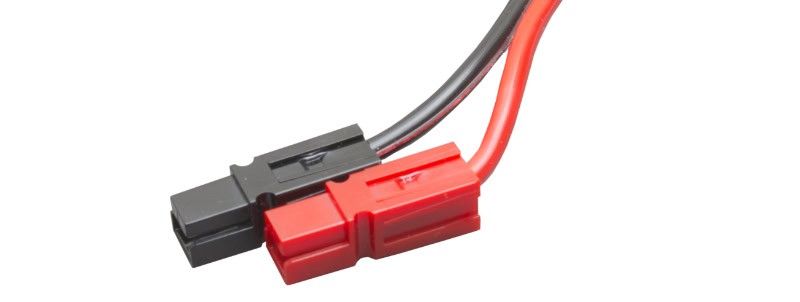
Assembly and Installation Tips
- Assemble housings correctly the first time, as they fit tightly and are difficult to separate
- Slide housings together before inserting contacts, especially when using heavier wire
- Do not snap housings together; they must slide using dovetail joints
- Dovetail joints only engage in one direction, so check alignment before assembling
- Orient contacts before crimping to avoid twisting the wire during insertion
How to Crimp Powerpole Connectors (Step-by-Step)
1. Prepare the Housings
Slide the connector housings together before installing contacts.
2. Strip the Wire
Strip approximately 3/16" (4–5mm) of insulation.
3. Insert Wire into Contact
Insert the wire fully into the contact so all strands are contained within the barrel.
4. Crimp the Contact (Critical Step)
Use a proper crimping tool designed for Powerpole contacts.
- The wire should be fully captured
- The contact should not be flattened
- The crimp should not increase contact width
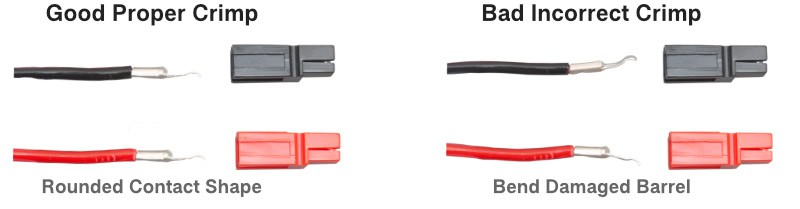
Proper crimp characteristics:
- Wire cannot be pulled out with a firm tug
- No loose strands visible
- Contact retains correct shape
Important: Contacts that are too wide will not insert into the housing.
5. Insert Contact into Housing
Insert the contact with correct orientation toward the internal spring.
- Push until a click is felt
- Ensure it locks into place

6. Verify Installation
Gently tug on the wire to confirm it is secure.
Common Assembly Mistakes
- Flattening the contact during crimping
- Incorrect orientation
- Using the wrong wire size
- Snapping housings instead of sliding
Final Checks and Best Practices
- Confirm contacts are fully locked
- Ensure connectors mate smoothly
- Verify polarity before use
Get Started
Powerpole® is a registered trademark of Anderson Power Products.